
Charge a custom amount after a routine site visit has been completed.
Product: FireMate Desktop
Contents
Understanding Do & Bill billing
The Do & Bill billing option is used where an invoice should be sent after the works to the site have been completed. Do & Bill also allows a FireMate Administrator to change the charge for the visit, based on the works completed.
Once a Routine Activity has been completed for a Product that is set to Do & Bill, FireMate will automatically create a Service Request, allowing the FireMate Administrator to enter the right amount for the visit, with the option to add any additional charges (such as a callout fee) before generating an invoice.
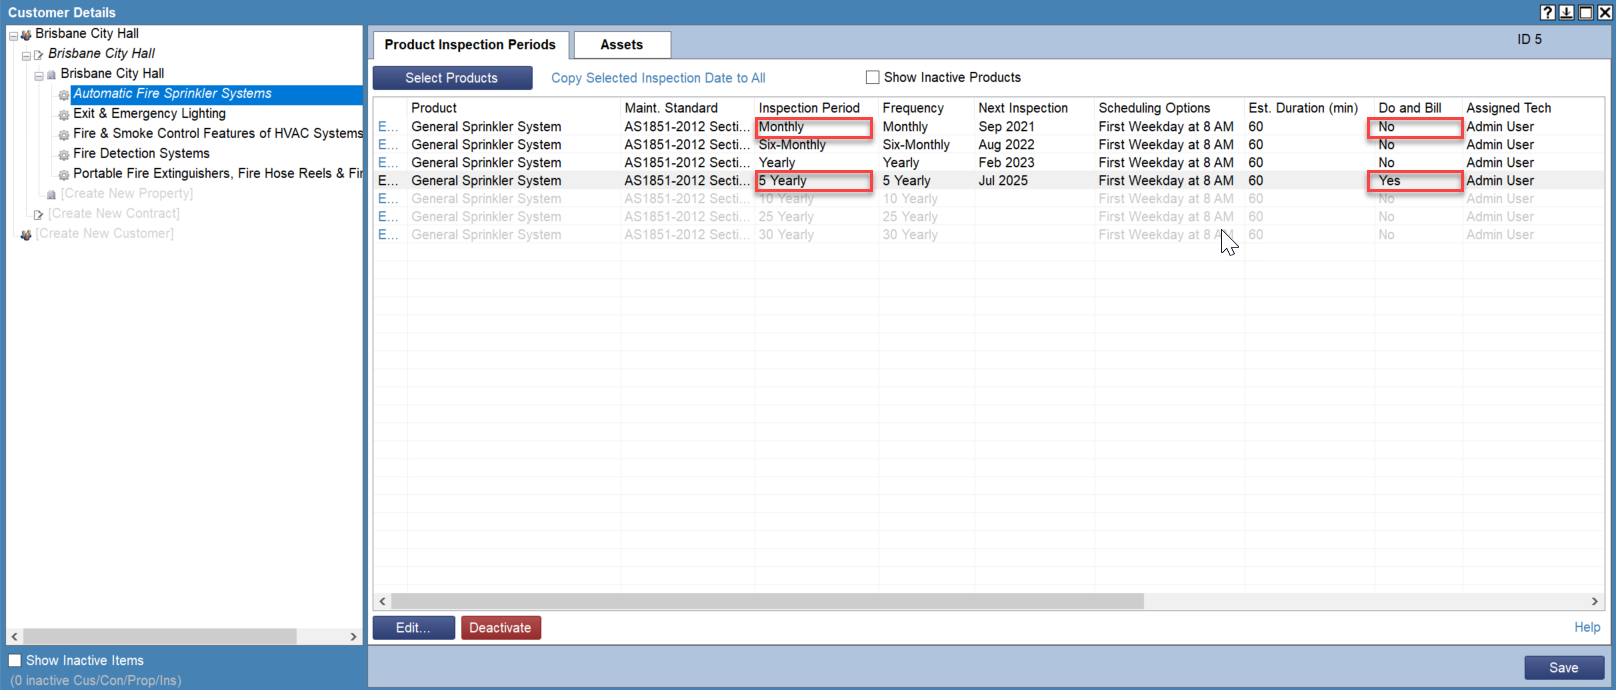
Do & Bill is a billing type that is applied to the Product Inspection Period which allows for some inspections to be set as Do & Bill, and others to be set as another billing type.
Combining Contract and Do & Bill billing
In some cases, you may wish to bill all monthly Product Inspection Periods under the contract , and set all 5 yearly inspections as the Do & Bill billing method. Doing this results in a recurring invoice for a set amount for monthly inspections, and allows a FireMate Administrator to process the 5 yearly inspections at a different rate.
Not sure this is the right billing option for you? Click here to check out an article that can help you decide!
How to set up Do & Bill billing
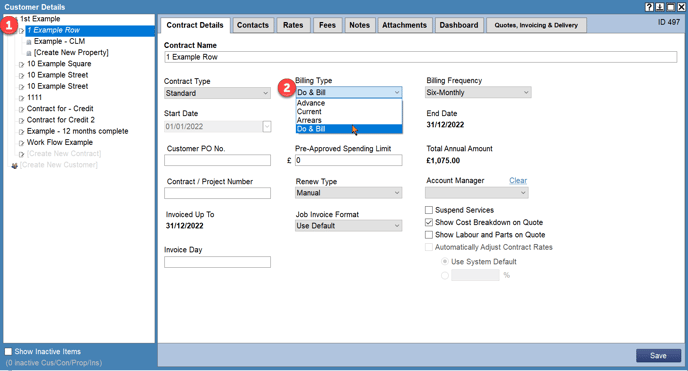
Step 1: Set up Do & Bill billing on the Contract level
- Select the Contract level of the
- Select the "Billing Type" dropdown and select [Do & Bill]
- Select [Save]
A prompt will display requesting if all Products under the contract should be set to "Do & Bill". Select [Yes] to this prompt where all products will be billed via the Do & Bill method.
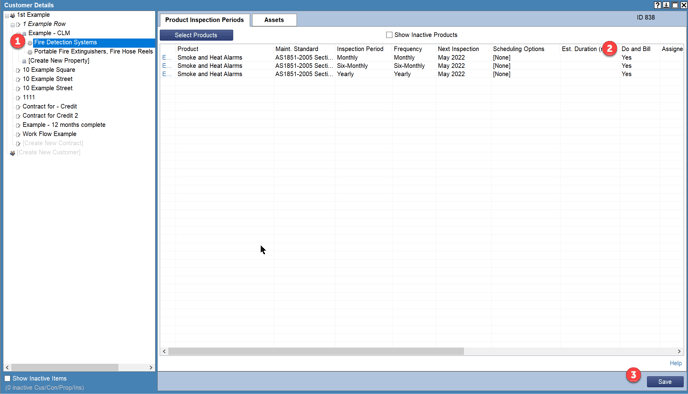
Step 2: Set an individual Product as Do & Bill
Where [Yes] was selected to the prompt in Step 1, this step can be skipped.
- Select the Product level
- Locate the "Do and Bill" column and set to [Yes] for the desired Product Inspection Periods
- Select [Save]
Not convinced this is the right billing method? Use this tool to help !