You've done the work, now it's time to get paid.
Product: FireMate Desktop
Contents
- Invoicing
- SR’s ready to be invoiced
- Invoice SR’s that have derived from a Quote
- Generate an invoice
- Price Breakdowns
- Change invoice and payment due dates
- Sending invoice to client
- Invoice for part payment – Option 1
- Invoice for part payment – Option 2
- Invoice SR’s that have derived from a Call-Out
- Labour charges
- Invoicing Consolidated Invoices
-
Invoicing from RA’s (products set to PIL invoicing)
Invoicing
The last step of the RA/Defect/Quote/SR cycle.
The work is done, it is time to get paid for services rendered.
SR’s ready to be invoiced
Invoices are derived from various different methods: Quotes, Call-outs, Consolidated Invoices and Routine Activities.
SR’s ready to be invoiced can be found in all of the following places:
-
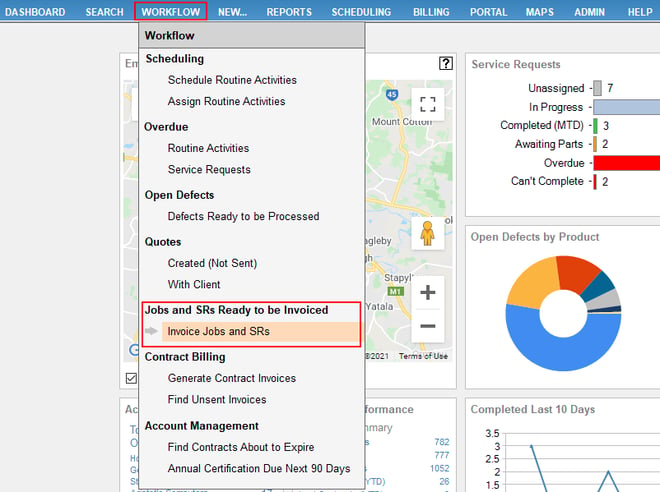
Select [WORKFLOW] and [Invoice Jobs and SRs] under 'JOBS AND SRs READY TO BE INVOICED'
-
Alternatively, from the Dashboard, go to the "Invoice Summary" tile and select [SRs Ready To Invoice]

-
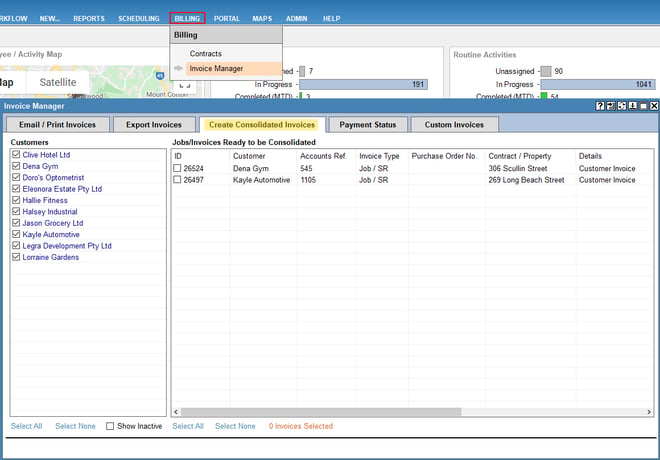
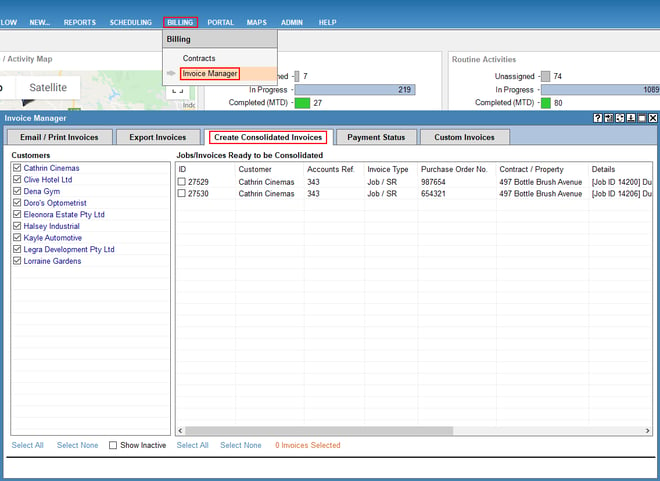
Consolidated invoices can be found under the [BILLING] menu in the [INVOICE MANAGER] on the [Create Consolidated Invoices] tab.
Invoice SR’s that have derived from a Quote
- Select [Workflow], [Invoice Jobs and SRs]
- Select the SR from the available list
-
Check that all tasks have been completed on the SR
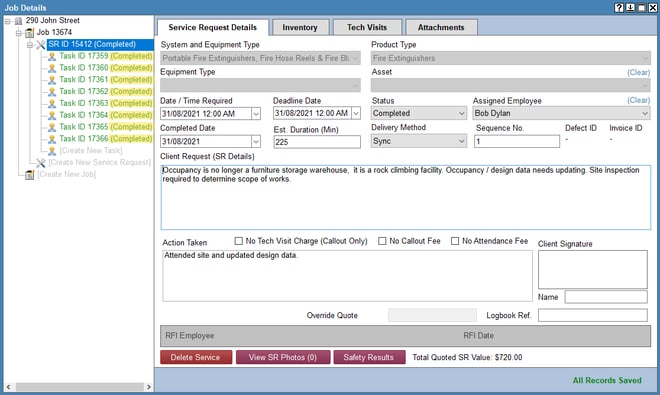
-
Are all tasks completed and no additional works carried out?
- Yes: change the status of the SR to Ready For Invoicing (RFI)
- No: Where additional works have been carried out but where not included on the quote, refer to section Invoice SR’s that have derived from a Call-Out
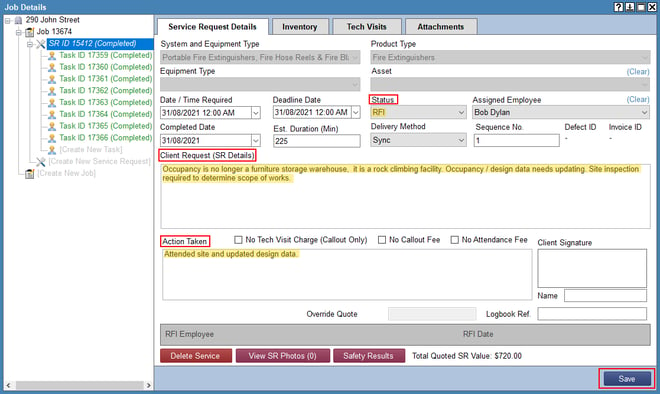
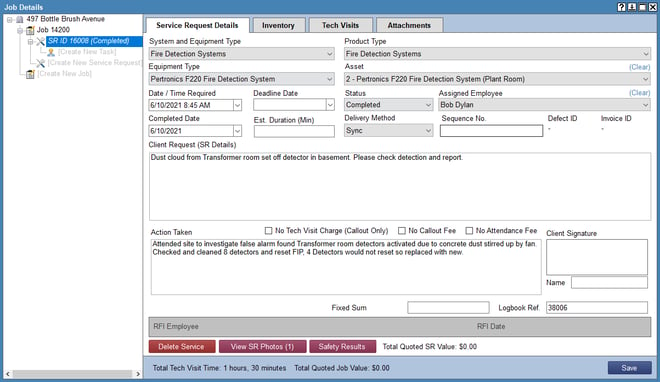
- Tidy up [Client Request] and [Action Taken] fields as these will be shown on the Invoice generated.
- Set the [Status] to RFI and Save.
Generate an invoice
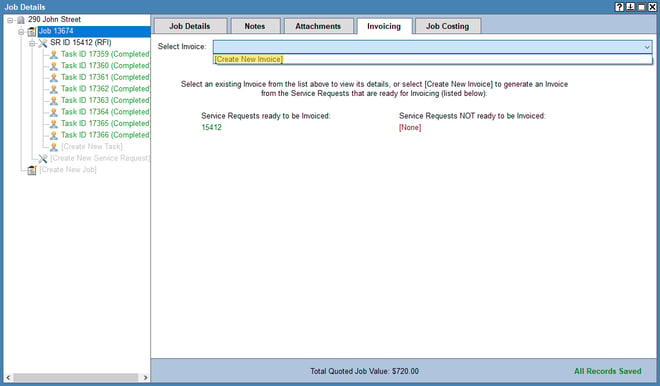
- Go to the [Job ID]
- Select the [Invoicing] tab
-
Select [Create New Invoice]
- Check the total amount of the invoice to ensure it is correct
-
Select the [Create New Invoice] button and your invoice will generate.
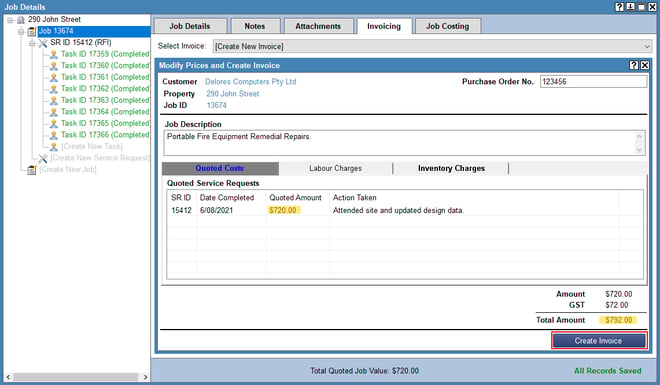
The Job Invoice number populates in the top left-hand corner.

Price Breakdowns
You have the option to [Hide Price Breakdown on Printed Invoice] (for quoted invoices only) by ticking the box.
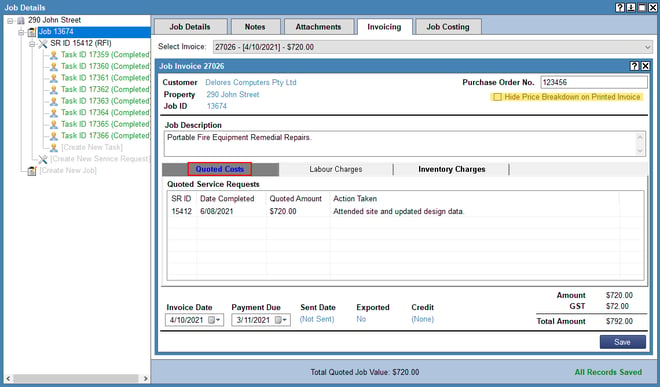
- The [Quoted Costs] tab shows quoted charges.
-
The [Labour Charges] tab is not applicable here as the job was quoted

-
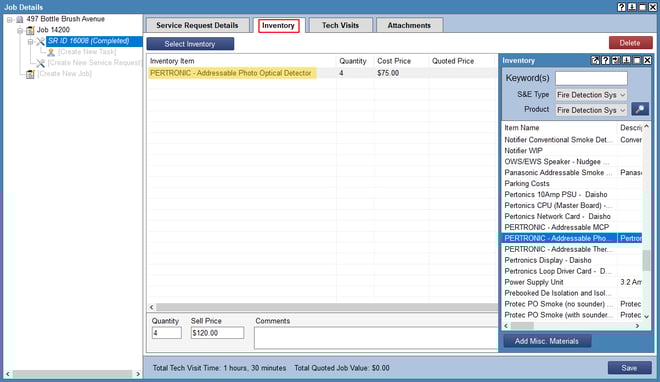
The [Inventory Charges] tab shows the material used.
Note: Parts included in the quoted costs will be listed as $0.00.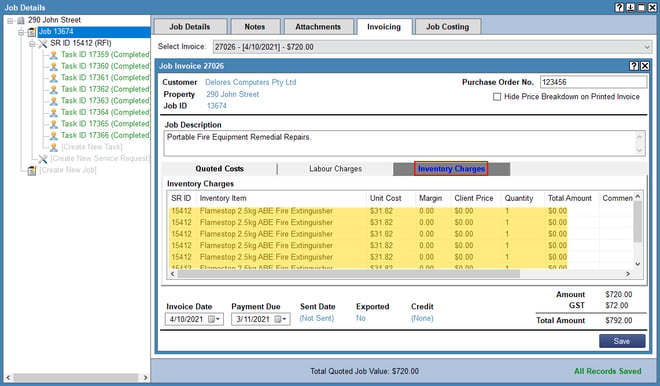
Change invoice and payment due dates
If required, you can change the [Invoice Date] and [Payment Due] date.
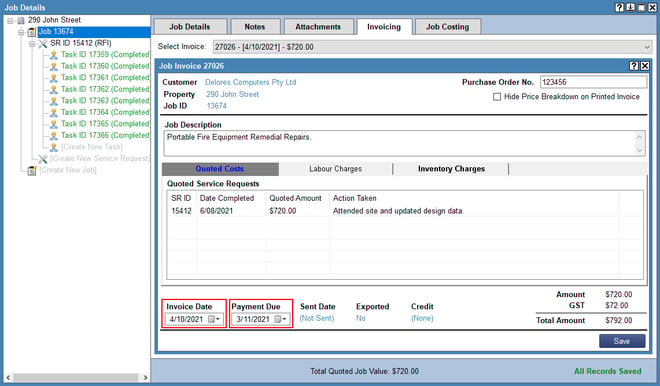
The [Sent Date] and [Exported] fields will automatically update once sent and exported to your Accounting package.
However, you also have the option to change these by hovering and clicking on the blue writing.

An invoice must be marked as sent before it can be imported into your accounting package.
Here you also have the option to credit the invoice – please refer to the Crediting Invoices Manual .
Sending invoice to client
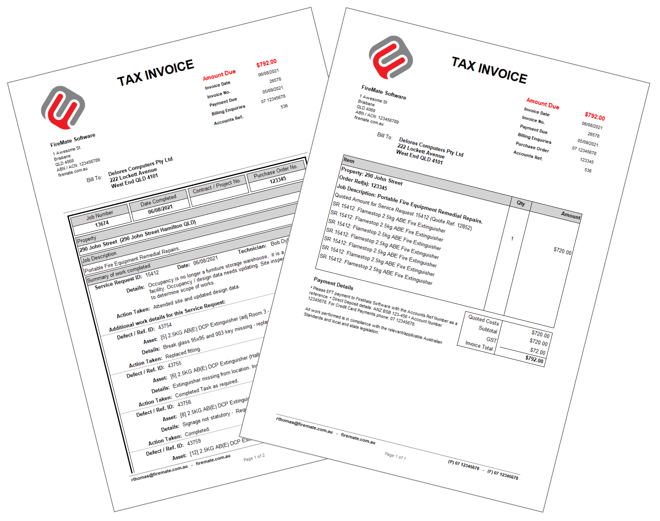
Clicking on [Preview Invoice] opens the invoice, here you have the option to preview in [Detailed] (this is the default format) or [Summary] format.
There are two options to send the invoice to your client:
- The [Send to Client] button will open a draft email in Outlook for you to send to your Customer
-
The [Send Automatically] button will send an email from the FireMate server instantly.
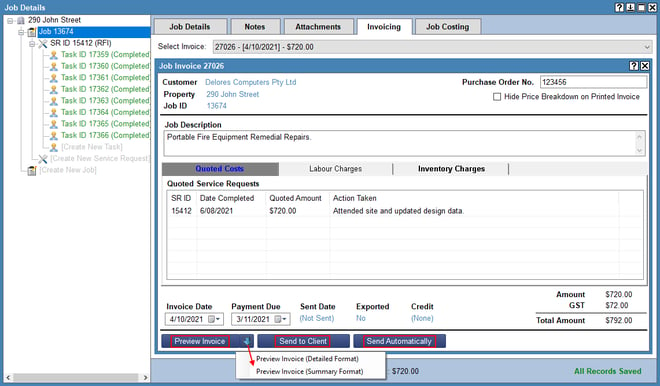
[Send Automatically] must be set up prior to using this option – please refer to the Send Automatically manual .
Invoice for part payment – Option 1
For those quoted works where not all tasks are completed there are a couple of options to invoice for part payment.
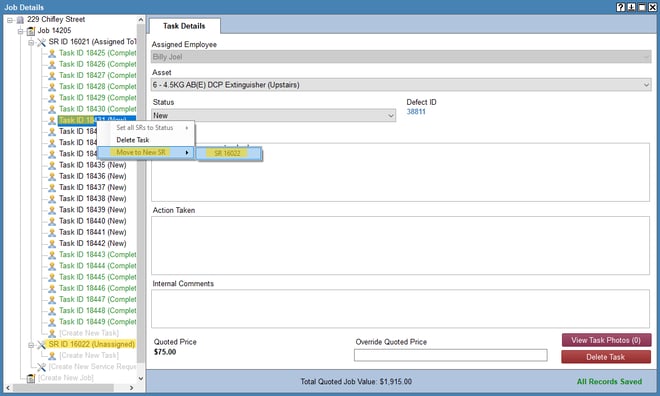
- Create a new SR under the same JOB ID (ensuring the [S&E] and [Product type] match that of the original SR and the [Delivery Method] is selected)
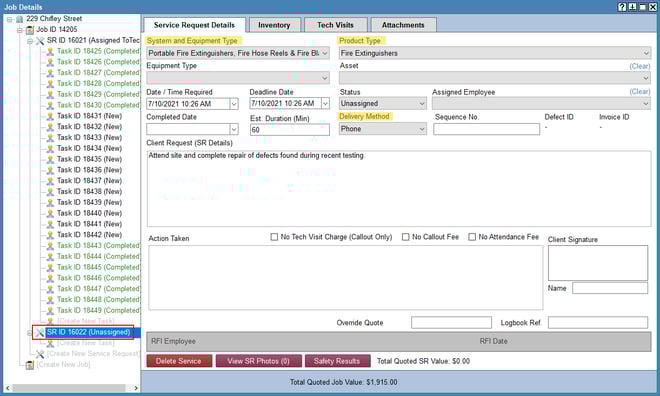
- Move tasks down to the new SR
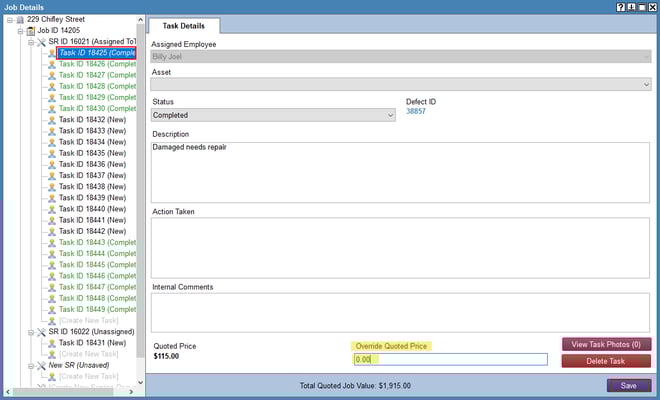
Invoice for part payment – Option 2
- Again create a new SR under the same JOB ID and enter a [Fixed Sum].
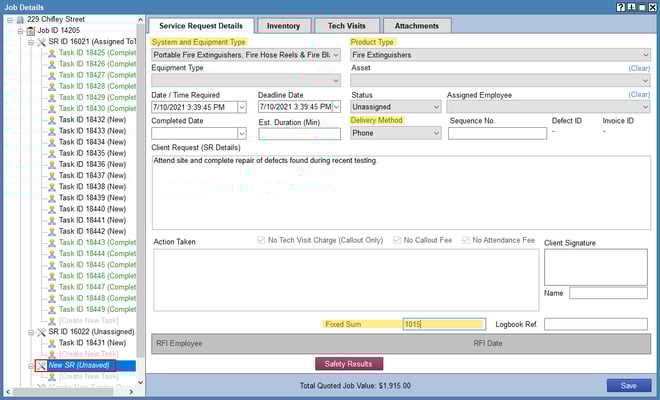
- [Override the quoted price] in those tasks under the original SR to account for the value invoiced on the new SR.
- Follow steps to invoice as per Generate an Invoice .
Invoice SR’s that have derived from a Call-Out
SR’s that have derived from a Call-Out will be sitting in [WORKFLOW]//[Invoice Jobs and SRs].
-
Open SR and ensure all works are completed. If not, a secondary SR may need to be raised under the JOB ID.
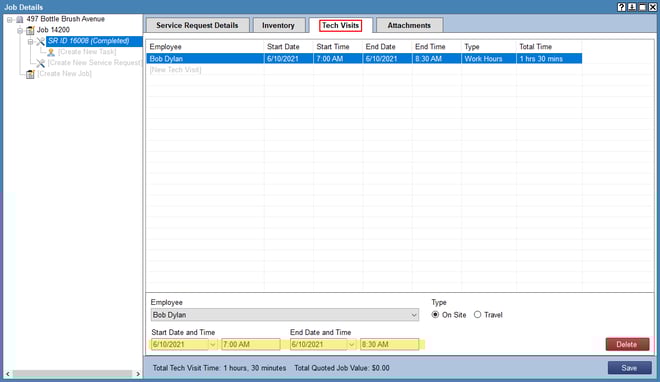
- Upon confirmation of works finalise invoice. Ensure that all equipment is listed for billing in the [Inventory] tab and [Tech Visits] have been entered by the tech.
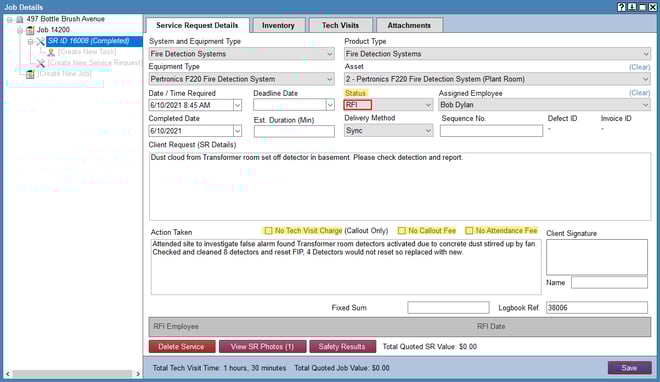
- Should there be no labour to be billed, tick the [No tech Visit Charge] box.
- Should only labour be billed, tick the [No Callout Fee] box.
- Should no attendance fee be billed, tick the [No Attendance Fee] box.
- Set the SR [Status] to RFI and invoice as per Generate an Invoice
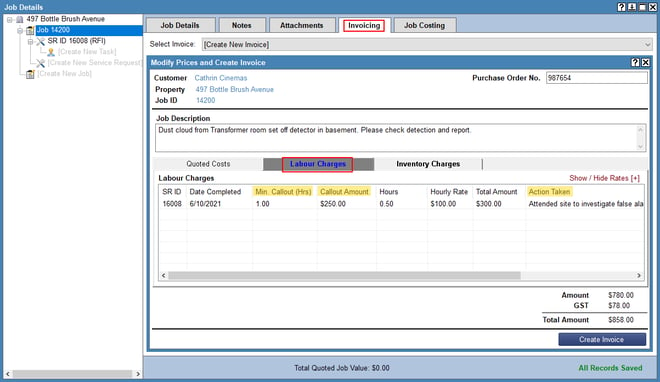
Labour charges
In the [Invoicing] tab when you select [Create New Invoice] there is still the ability to modify Labour Charges if required.
In the [Labour Charges] field click into the [Min. Callout (Hrs)], [Callout Amount] or [Action Taken] fields to amend as required.
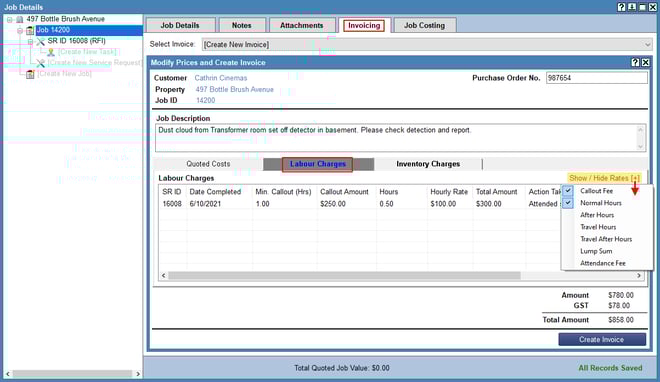
Clicking the [Show/Hide Rates [+]] brings up further options for additional charges.
Invoicing Consolidated Invoices
To create consolidated invoices please refer to our manual Consolidated Job Invoices .
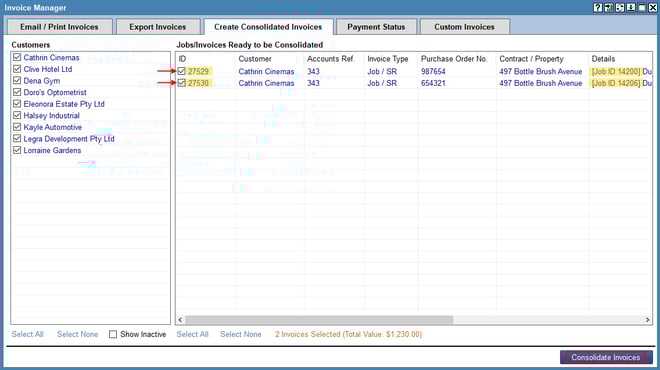
Consolidated invoices are found in [BILLING]/[INVOICE MANAGER]/[CREATE CONSOLIDATED INVOICES] tab.
Select those JOB ID’s that are ready to be invoiced and hit the [Consolidate Invoices] button.
Invoicing from RA’s (products set to PIL invoicing)
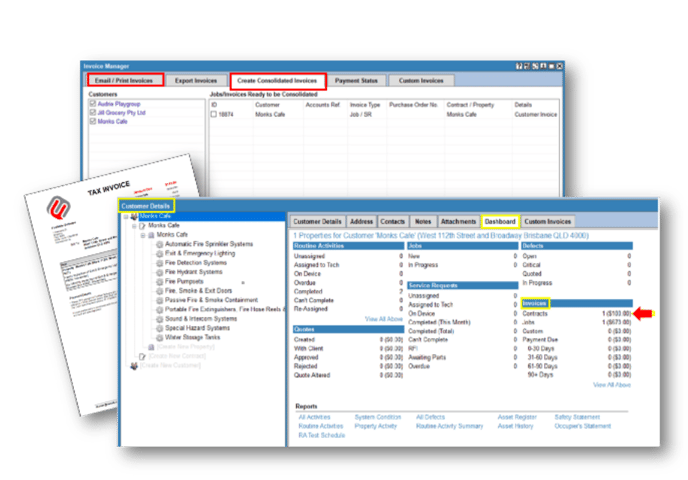
These invoices can be found in [BILLING]/[INVOICE MANAGER]/[Create consolidated invoices] tab (if your Customer is set to “Enable Consolidated Invoicing”).
Alternatively, if not consolidating the invoices they will be in the [Email/Print Invoices] tab.
Generate as per previous step. Invoices generated by this method are known as “Line Item Invoices”. These invoices will only appear on the Customer [Dashboard] under [Contracts] in the [Invoices] section.