To run FireMate over the VPN, the WireGuard VPN Client software must first be configured.
FireMate Desktop
If, for any reason, your computer does not allow you to run the "wireguard-software-installer.exe" software, contact your IT Administrator or direct manager to assist.
Contents
- About the VPN Client Configuration
- How to install the VPN Client (opens in a new page)
- Automatic VPN Client Configuration
- Manual VPN Client Configuration
About the VPN Client Configuration
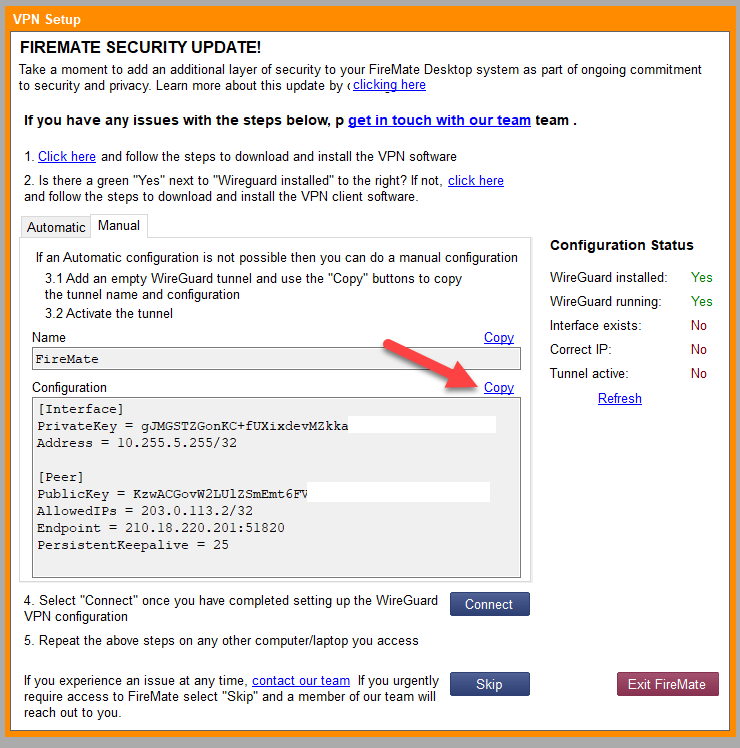
If you have not yet configured the WireGuard VPN Client software, the system will display the following prompt when you log into FireMate.
If you have the right Windows permissions, you will be able to use the 'Auto Configure' option to set up the Wireguard VPN software. If this should fail for any reason, there is also a Manual configuration set of steps to follow which are documented below.
These instructions only need to be carried out once, and you will not be prompted to set these up again in the future.
If, for any reason, your computer does not allow you to run the "wireguard-software-installer.exe" software, contact your IT Administrator or direct manager to assist.
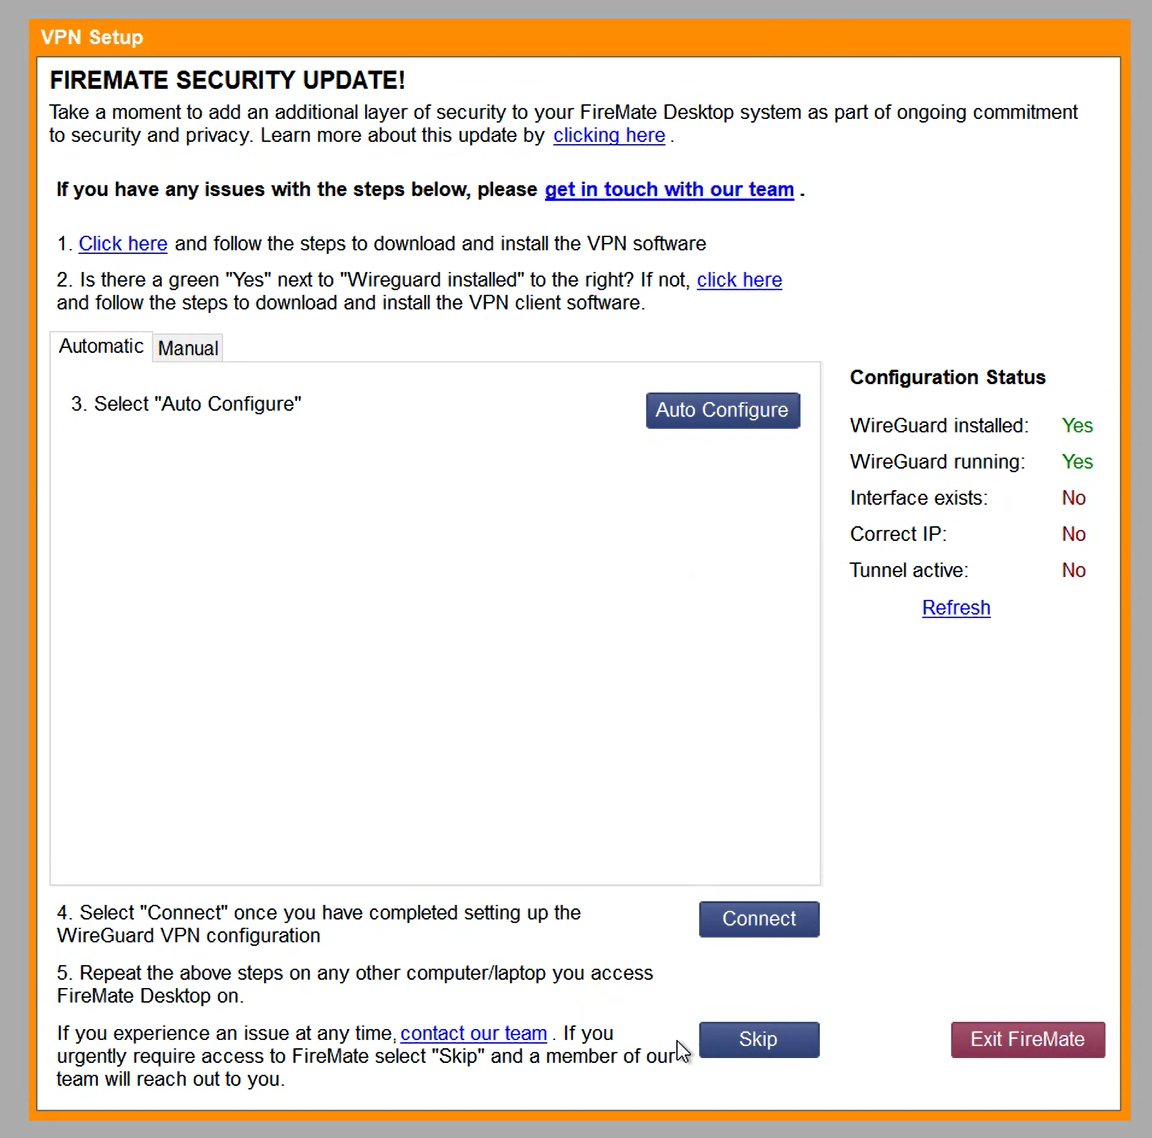
Automatic Configuration Steps
If, for any reason, your computer does not allow you to run the "wireguard-software-installer.exe" software, contact your IT Administrator or direct manager to assist.
-
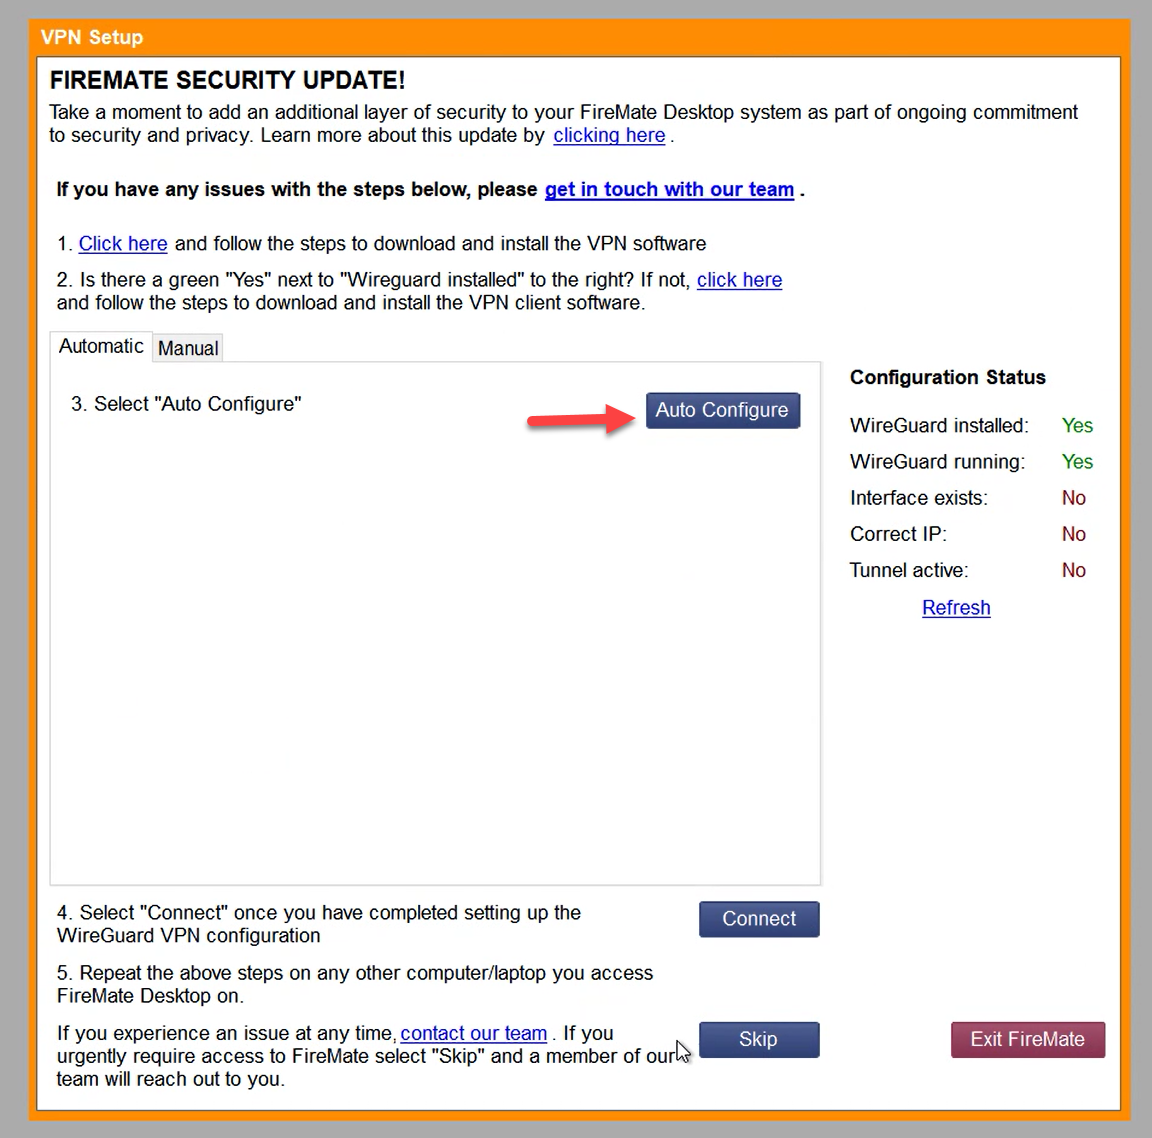
To automatically configure the WireGuard VPN software, simply select the 'Auto Configure' on the screen.
-
You may be then prompted to allow the Windows Command prompt to make changes to your device. If prompted, answer Yes.
-
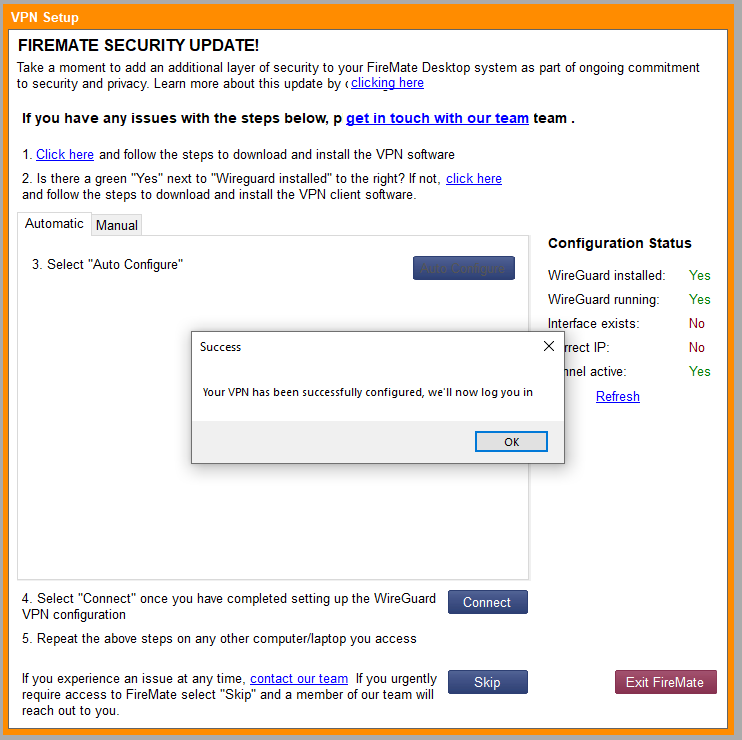
Upon successful completion of the automatic configuration, you will then be automatically logged into FireMate and your VPN set up is complete!
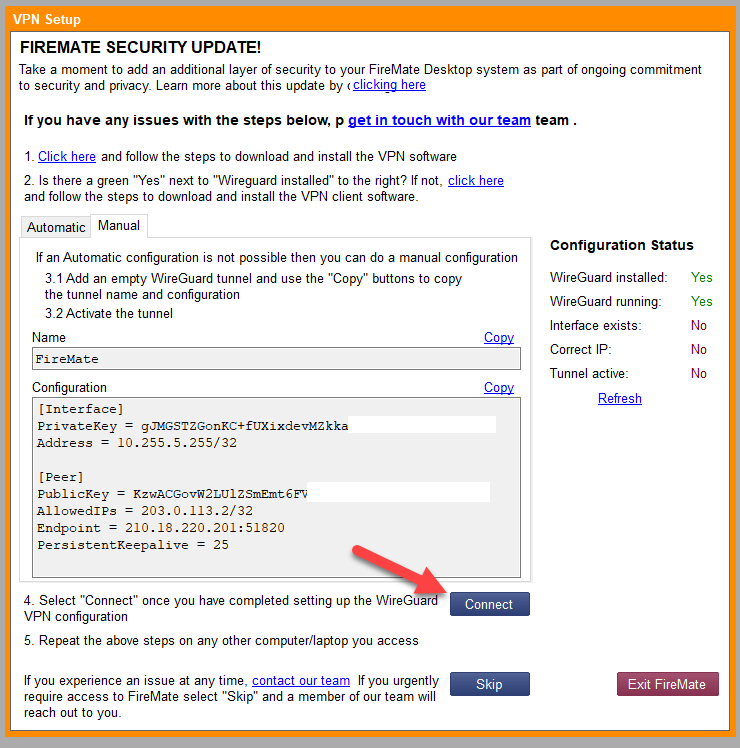
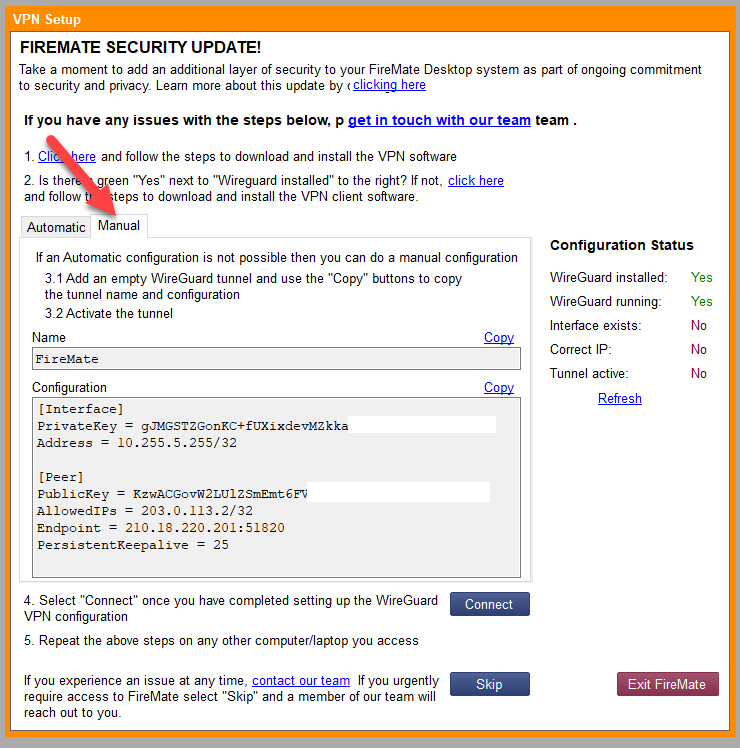
Manual Configuration Steps
Should the 'Auto Configure' option fail for any reason, you may be able to configure the VPN software with the following manual steps.
If, for any reason, your computer does not allow you to run the "wireguard-software-installer.exe" software, contact your IT Administrator or direct manager to assist.
-
Select the 'Manual' tab on the screen
-
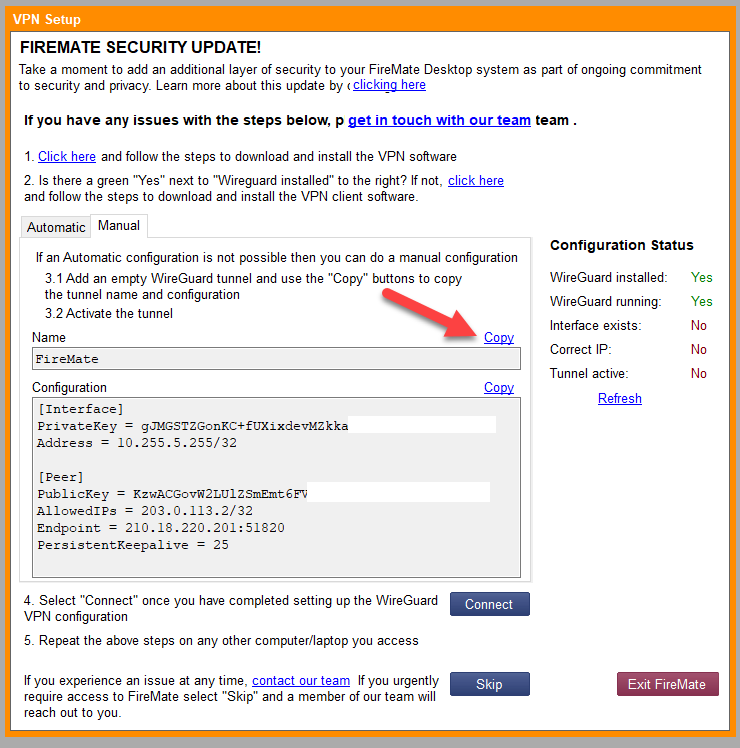
Select 'Copy' to copy the 'Name' configuration to your Windows clipboard.
-
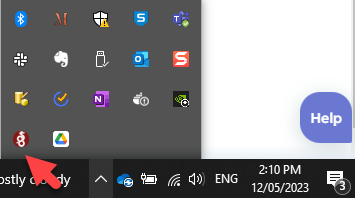
Open the WireGuard VPN software from your Windows System Tray by selecting this icon.
-
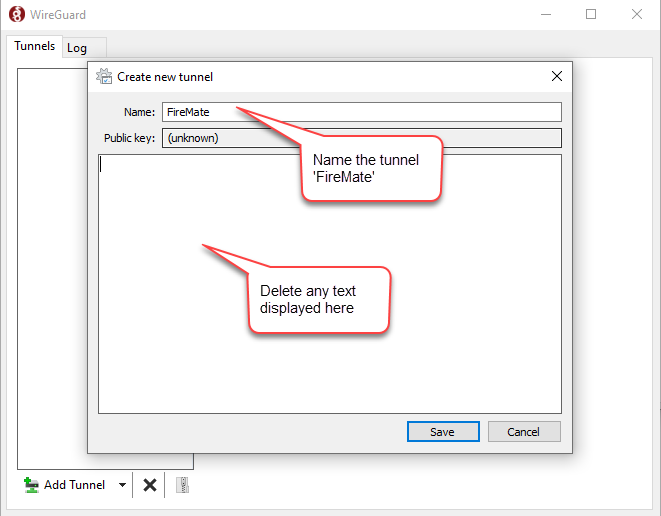
Select the 'Add Tunnel' dropdown and then select 'Add empty tunnel...'
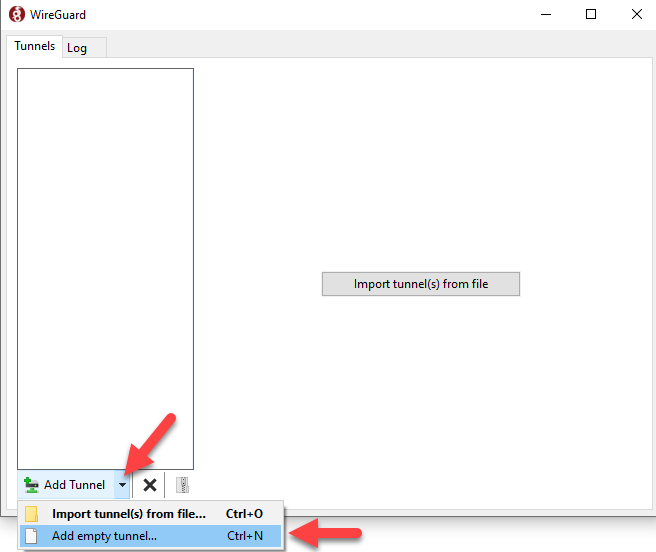
- Name the Tunnel ' FireMate ' or hold down Control+V on your keyboard to paste the Name previously copied in Step 2.
-
Delete all of the text in the details section in the WireGuard configuration dialog.
-
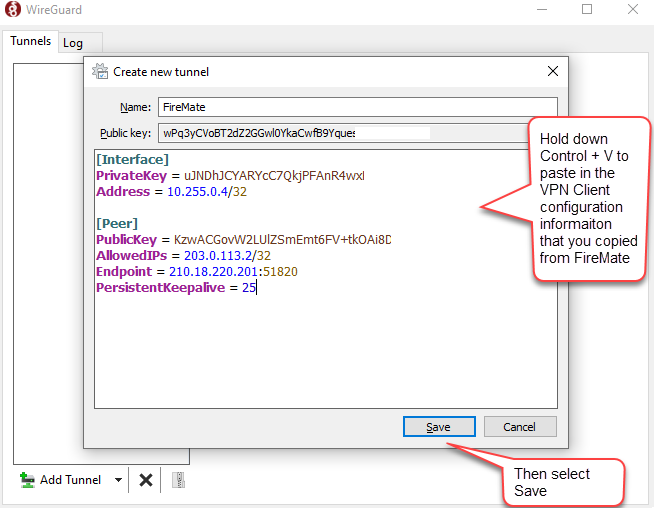
Go back to FireMate and select 'Copy' next to the configuration section. This will copy the configuration to the windows clipboard so that you can paste it into Wireguard.
-
Paste the VPN Configuration configuration textbox in Wireguard by holding down Control+V on your keyboard, then select 'Save'.
-
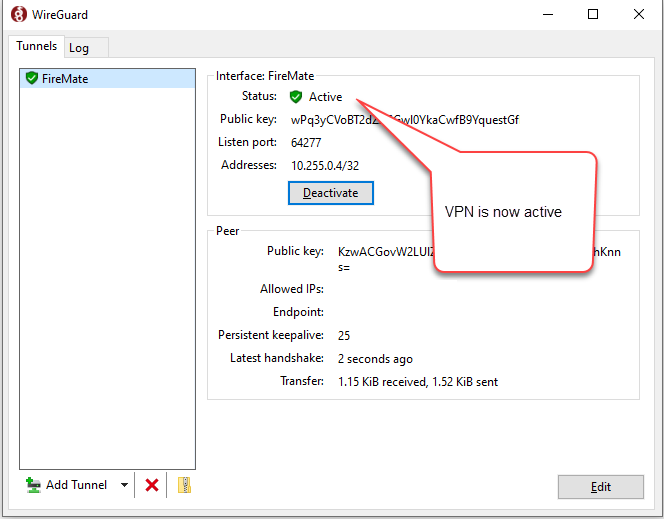
At this point the VPN configuration is all set up and ready to go. You just need to select 'Activate' to turn it on.

-
Once you select 'Activate' you should see the Status change to a green light and the word 'Active' will be displayed.
-
Your VPN is now up and running and you can return to FireMate and select 'Connect' to log into FireMate.