
Learn how to create a Contract in FireMate!
Product: FireMate Desktop
Contents
Contract Overview
Once your Customer has been created, you are ready to set up one or more Contracts that relate to the Properties being serviced.
Contract Details
- To create a new Contract, select [Create New Contract] from the left menu on your Customer card.
- A blank Contract card will pop up, please enter the "Contract Name" within the blank field.
- Once the name has been entered, you can add the required information such as contract type, billing type contract start date etc.
- Select [Save]
Check out our help article on Billing Types
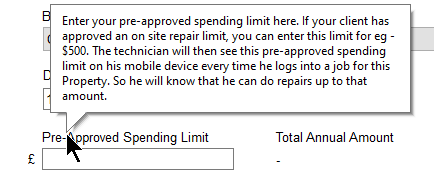
Hovering over headers provides tips on how this field should be completed
Contacts
- Select [Contact] Tab
- Create New Contact or Find Contacts - Both are located at the bottom of the Contacts screen.
Create New Contact
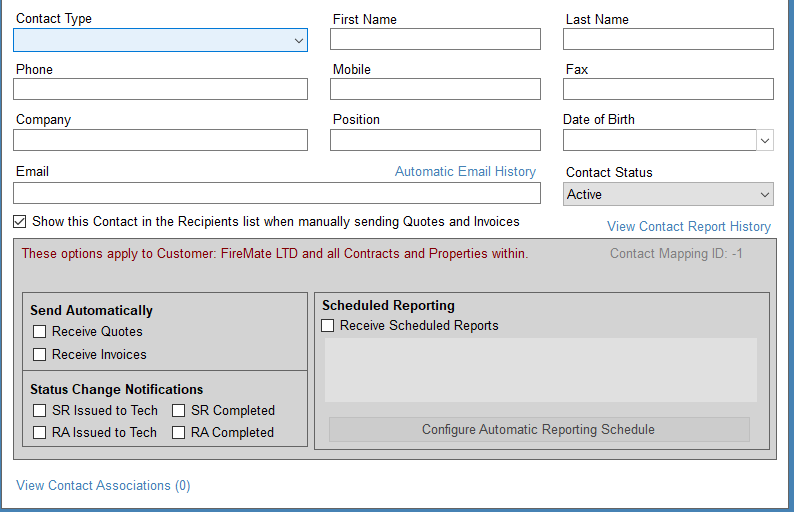
- To create new contacts, select [Create New Contacts]. The contact details page will then show. You can complete the following fields:
-
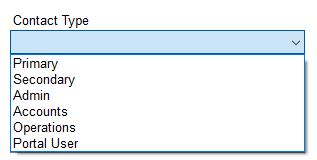
Contact Type:
There are 6 contact types you can select. The types are Primary, Secondary, Admin, Accounts, Operations, Portal User. This option helps you identify the type of contact and this can be based on their role or how you wish to contact them, but it does not create any rules or actions based on what you select.
- You can enter the First Name, Last Name, Phone, Mobile, Fax, Company, Position, Date of Birth, and Email. Not all fields are required but you need to make sure any details you do provide are correct and in the right format. For example, an email is an email, a phone number is in the right format, etc.
- Contact Status: The contact status will be active unless the contact is no longer available or does not wish to be contacted, in which case you can change the status to inactive.
There is a checkbox available on the contact details screen stating "Show this Contact in the Recipients list when manually sending Quotes and Invoices"
If Users are opted to receive emails for different activities then this checkbox needs to be a tick. If users untick the checkbox, then customers will not receive the emails.
This doesn't affect any Auto Report or Scheduled Reporting emails.
Find Contacts
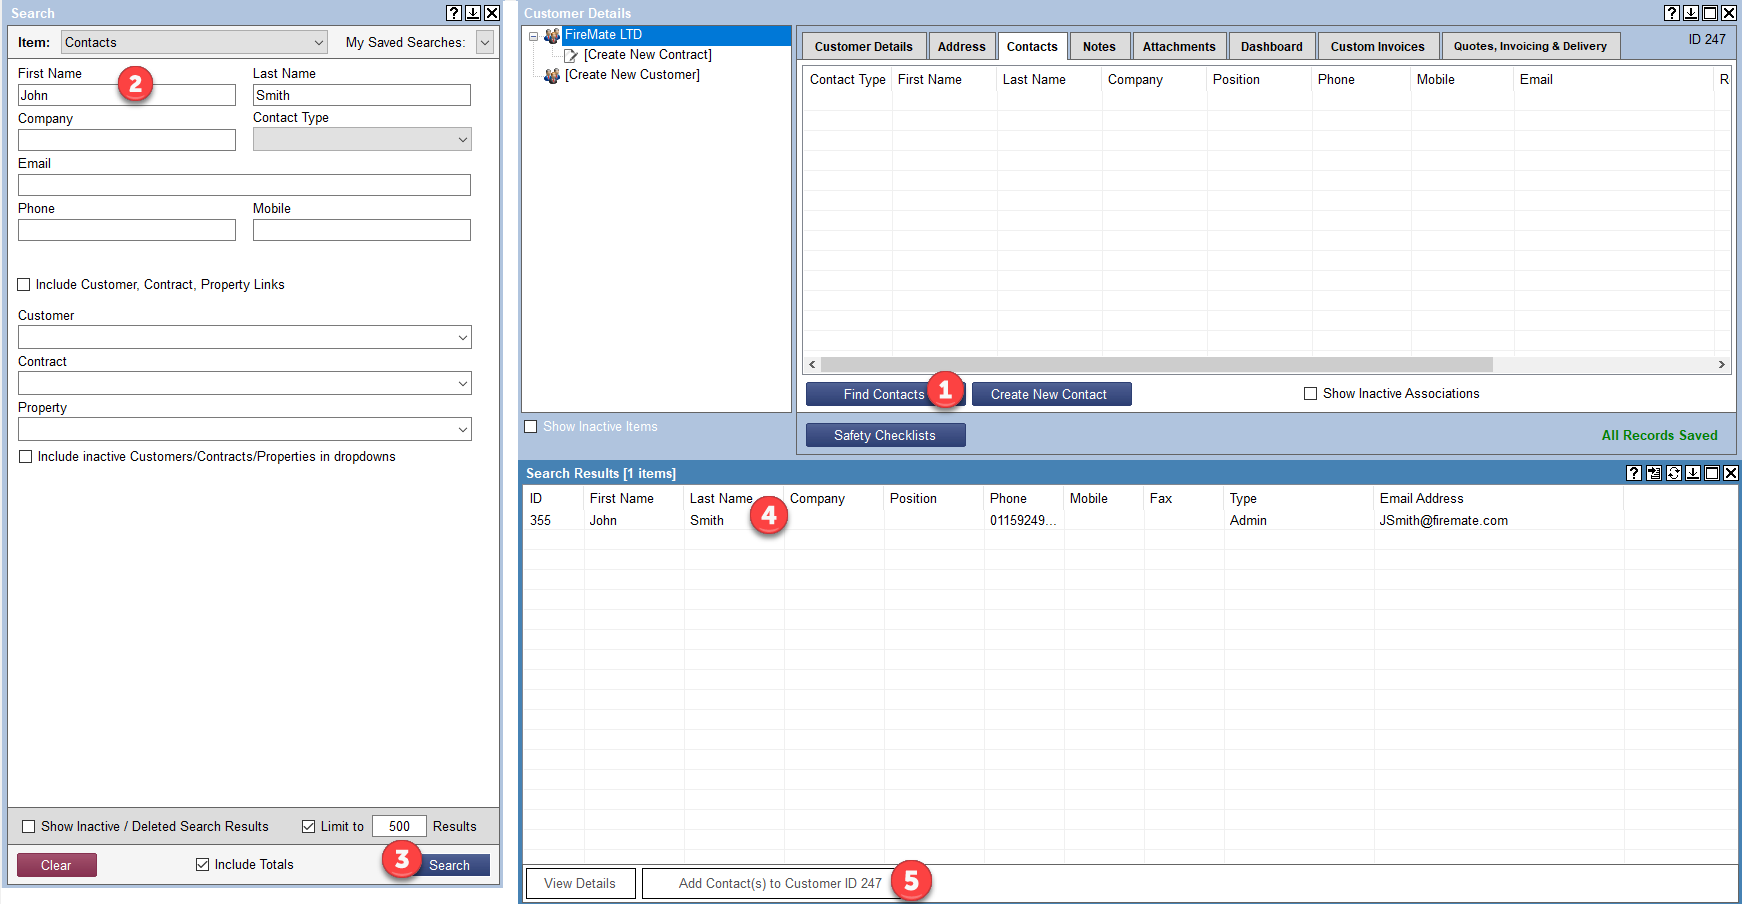
- To find a contact already entered within FireMate, select [Find Contacts]. The Master Search will then appear with contact Item prepopulated.
- Enter relevant details i.e., name or telephone number
- Select [Search] and based on the filtered criteria the list of contacts will display.
- Select the required contact and select [Add Contact(s) to Customer ID**]
- The selected contact details will then be added to the customer.
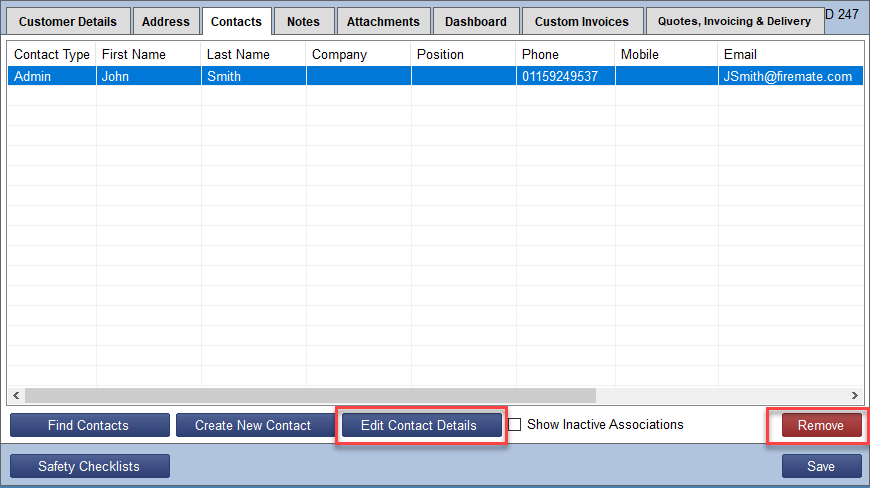
 Once the contacts have been added, Users can also perform the below two actions:
- Edit Contact Details: Users can edit existing contacts. Select the existing contact then [Edit Contact Details]
- Remove: Users can remove the existing contact or contacts from the current location. Select the existing contact details from the contacts screen, then [Remove] will be activated and display at the bottom of the contact screen.
Rates (if applicable)
Your Contract Invoicing rates, specific Labour Rates and specific Inventory Rates will be set up within this Tab. If your Contract does not have any specific rate to set up this can be left blank.
Check out our help article on Contract Invoicing
Fees
Your Contract fees can be set up within this tab i.e. subscription fees or annual charges separate to servicing visits. If your Contract does not have any fees to set up this can be left blank.
Notes & Attachments
If you have any notes or documents that are applicable to the Contract, for example the signed maintenance contract, this can be added via the [Notes] and [Attachment] Tabs.
Notes
- Select [New Note]
- You can then enter your note within the "Note Description" field
- Select the type of note and if this requires a start or expiry date.
- Select [Save]
Attachments
- Select [New Attachment]
- Select [Browse] and select the document.
- You can then update the name of the attachment and description within the "Name" and "Description" fields
- Select [Save]