
As an IT Administrator, you may need to configure the Wireguard VPN Client software on your user's behalf. The following steps need to be carried out.
Product: FireMate Desktop
If, for any reason, you cannot complete the steps in this guide, contact FireMate Support at support@firemate.com
Contents
- Installation of the WireGuard VPN Client Software
- Option 1: Import the .conf file
- Option 2: Copy the contents of the .conf file
- Option 3: Copy the .conf file across the network
- Setting up Wireguard on a Remote Desktop Server
- Next step: Configure the WireGuard software
Installation of the WireGuard VPN Client Software
Installing the WireGuard VPN Client software on your Users' PCs
In order to connect to the VPN, each User will need to have the Wireguard VPN client software running on their PC.
If Users do not have Admin rights to their PC, you will need to install the software on their behalf by following the steps in this article or downloading the relevant msi file from here and installing the msi across the network to each PC.
Option 1: Import the FireMate.conf file
-
Follow the steps in this
Knowledge Base article
to install the Wireguard VPN client software on the User's PC
-
Request the Wireguard configuration files for your User's PCs by contacting
FireMate Support
- Each file has been individualised to each PC and cannot be shared across multiple PCs.
- Remotely access the User's PC
- Copy the FireMate.conf file to this user's PC.
-
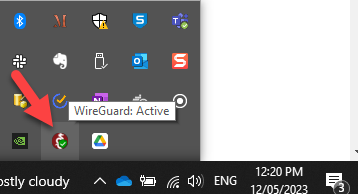
Open the Wireguard client from the Windows System Tray and select Import.
-
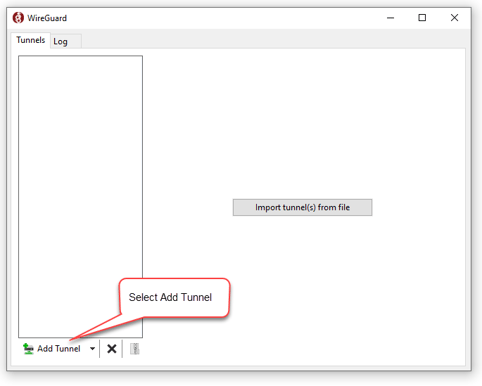
Select [Add Tunnel]
-
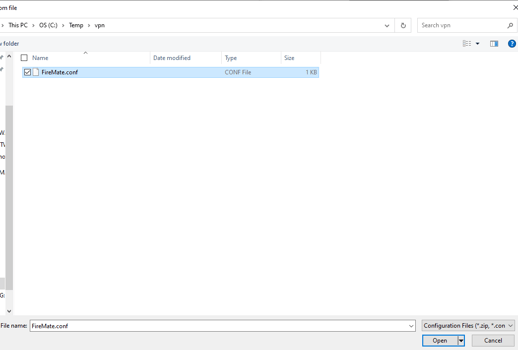
Locate the FireMate.conf file (completed in step 4 above) and select [Open].
-
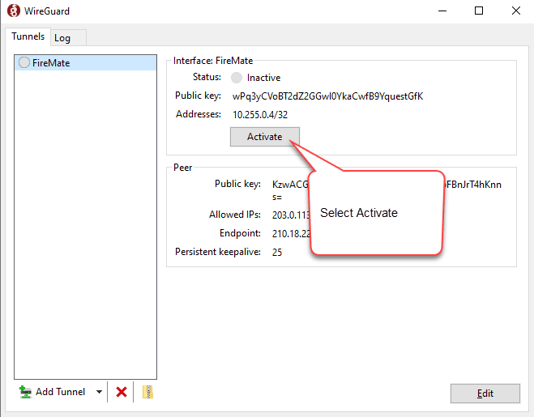
Select [Activate].
-
At this point the VPN tunnel will be created to the FireMate server and activated. The User will then be able to run FireMate across the VPN.
-
At this point the VPN tunnel will be created to the FireMate server and activated. The User will then be able to run FireMate across the VPN.
- Close and reopen FireMate Desktop
- Confirm the user can successfully log in to FireMate
You are now complete!
If, for any reason, you cannot complete the steps in this guide, contact FireMate Support at support@firemate.com
Option 2: Copy the contents of the FireMate.conf file
-
Follow the steps in this
Knowledge Base article
to install the Wireguard VPN client software on the User's PC
-
Request the Wireguard configuration files for your User's PCs by contacting
FireMate Support
- Each file has been individualised to each PC and cannot be shared across multiple PCs.
- Remotely access the User's PC
- Copy the FireMate.conf file to this user's PC.
-
Open the Wireguard client from the Windows System Tray and select Import.
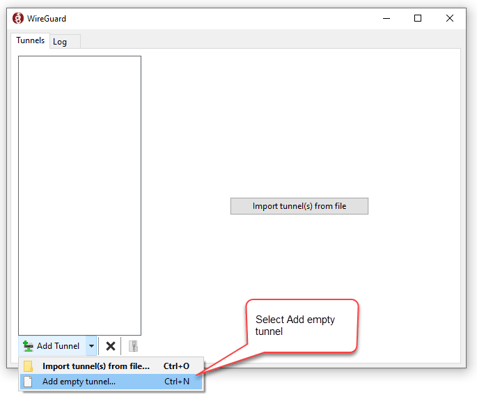
- Select [Add Tunnel]
-
Select [Add empty tunnel...]
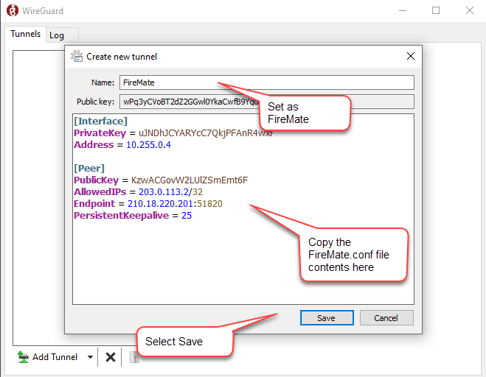
- In the "Name" field, type ' FireMate '
-
Locate the FireMate.conf file obtained in step 2 above, and copy the contents of the FireMate.conf file into the configuration section, below the "Public Key" field.
- Be sure to overwrite any information already within the field.
-
Select [Save]
-
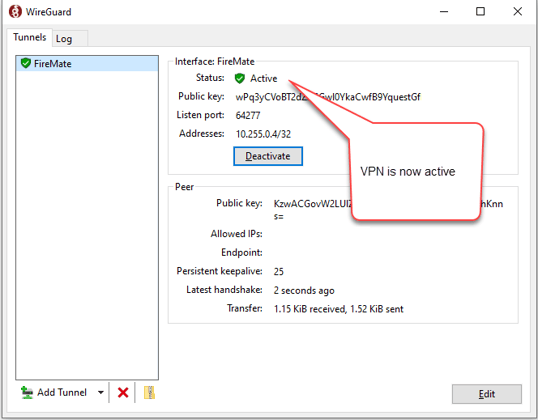
Select [Activate]
-
At this point the VPN tunnel will be created to the FireMate server and activated. The User will then be able to run FireMate across the VPN
-
At this point the VPN tunnel will be created to the FireMate server and activated. The User will then be able to run FireMate across the VPN
- Close and reopen FireMate Desktop
- Confirm the user can successfully log in to FireMate
You are now complete!
If, for any reason, you cannot complete the steps in this guide, contact FireMate Support at support@firemate.com
Option 3: Copy FireMate.conf file to the User's PC Wireguard directory across the network
-
Follow the steps in this
Knowledge Base article
to install the Wireguard VPN client msi on the User's PC through Windows Group policy management or by remotely access the User's PC to install manually
-
Request the Wireguard configuration files for your User's PCs by contacting
FireMate Support
- Each file has been individualised to each PC and cannot be shared across multiple PCs.
- Copy the FireMate.conf file which relates to each User's PC to the following folder: C:\Program Files\WireGuard\Data\Configurations
-
Restart the Wireguard Client on the User's PC either by logging onto the PC remotely or by running the following command to restart the Wireguard service on the PC from across the network
Run command prompt as administrator
wireguard /installtunnelservice "C:\Program Files\WireGuard\Data\Configurations\FireMate.conf.dpapi"
Setting up Wireguard on a Remote Desktop Server
If your users are running FireMate Desktop through a Remote Desktop server, you will need to install the Wireguard client in the following way.
- Log on to the Remote Desktop Server as the System Administrator.
- Install Wireguard, which will result in the software being installed as a windows service. See this article for Wireguard installation steps.
- Configure the Wireguard tunnel with the conf file supplied by our FireMate support team for your server.
- Ensure any firewalls have IP address 210.18.220.201 and Port 51820 open.
FireMate Desktop will then communicate through the Wireguard background service for all users.
If, for any reason, you cannot complete the steps in this guide, contact FireMate Support at support@firemate.com