Quickly identify which invoices were sent or imported from FireMate into your accounting package by adding an invoice Prefix to invoices created in FireMate.
Product: FireMate Desktop
Contents
- When to use an Invoice Prefix
- Choose an Invoice Prefix
- Set the Invoice Prefix for integration sent invoices
- Set the Invoice Prefix for manually export invoices
When to use an Invoice Prefix
FireMate prefix will assist you in knowing the difference between an invoice created in FireMate, and an invoice created directly into an accounting package (such as Xero, MYOB or Sage).
Use a FireMate invoice pre-fix to easily identify the invoices that have been created in FireMate, so you know where to go to see more details if you have any questions.
Choosing an Invoice Prefix
Choose a simple invoice prefix that you would like to display at the beginning of all invoices.
We recommend using " FM " as an invoice pre-fix for all methods of exporting invoices from FireMate.
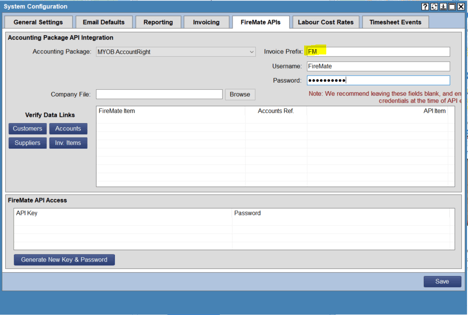
Set the Invoice Prefix for integration sent invoices
Where you opt to use an integration by FireMate, we strongly recommend completing the steps for manual export invoice prefix to ensure consistency in your FireMate database when invoices are exported using different methods.
- From the FireMate navigation bar, select [Admin]
- Select [System Configuration]
- From the System Configuration dialogue box, select the [FireMate APIs] tab
-
In the "Invoice Prefix" field, add a prefix.
- We recommend using "FM" as the prefix.
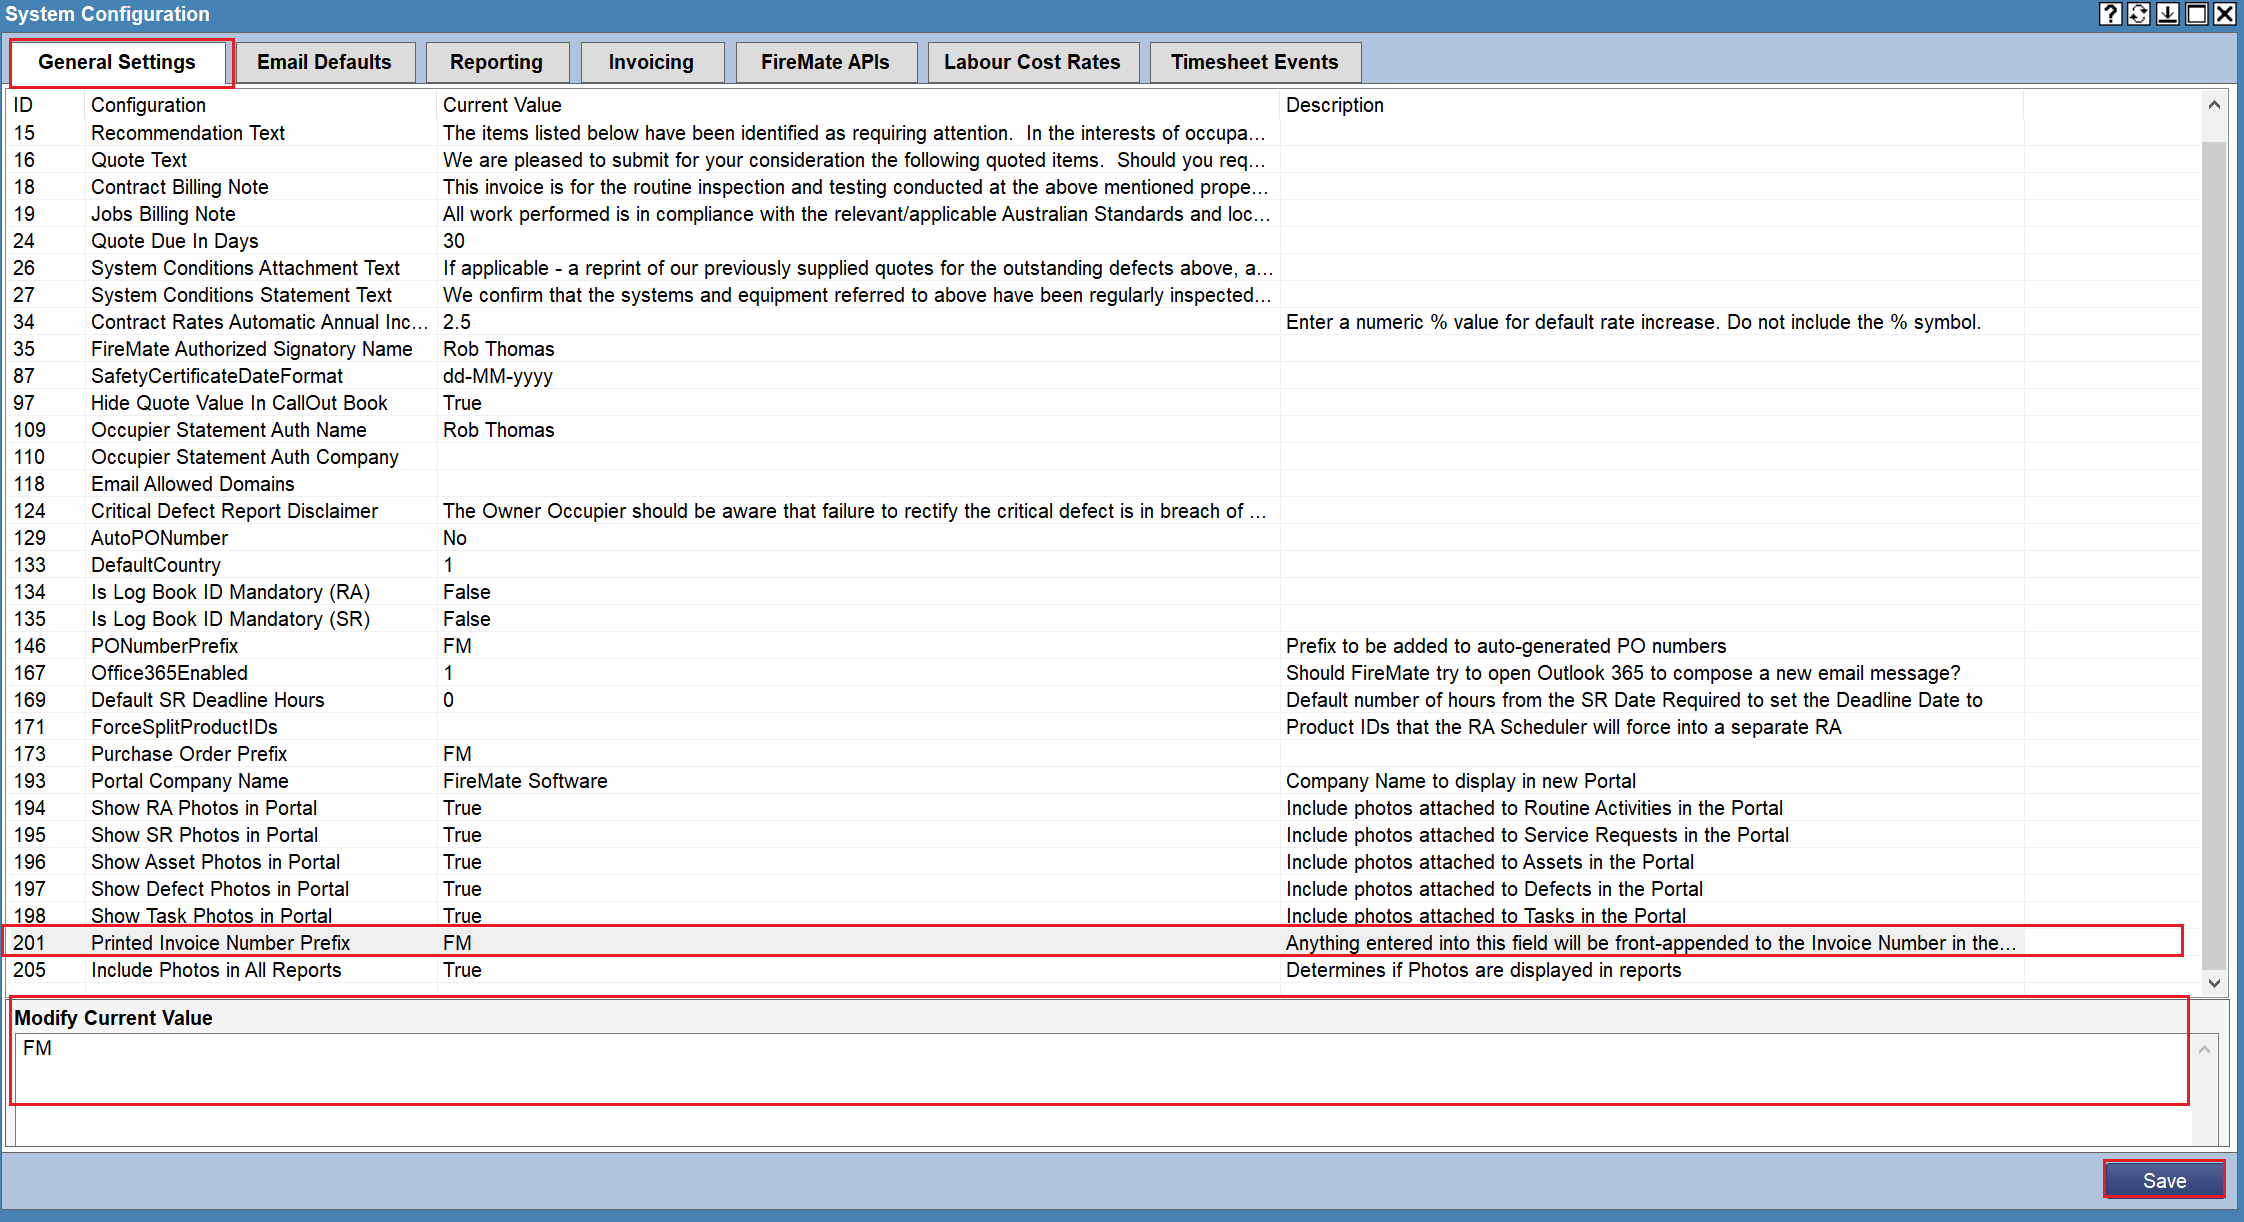
Set the Invoice Prefix for manually exported invoices
This section applies where you intend on exporting FireMate invoices and manually importing them into an external accounting package.
- From your FireMate navigation bar, select [Admin]
- Select [System Configuration]
- Select the [General settings] tab
- Scroll the list of General Settings to locate ID 201 listed as " Printed Invoice Number Prefix ".
- Select the " Printed Invoice Number Prefix " line, and enter your Invoice Prefix into the "Modify Current Value" field
- Select [Save]