
Change the FireMate Dashboard to suit you!
Product: FireMate Desktop
Contents
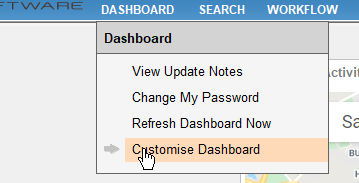
How to open Customise Dashboard
- From your FireMate navigation menu, select [Dashboard]
-
From the dropdown, select [Customise Dashboard].
Change the Dashboard widgets
After selecting Customise Dashboard , widgets can be dragged from the menu located on the right.
Add a widget to the dashboard by left-clicking on the widget, holding and dragging the widget onto the Dashboard.
You can also change the placement of your widgets by dragging them around the page to match the size of the tile to the grey squares.
Widgets can also be removed by dragging this back to the menu on the right.
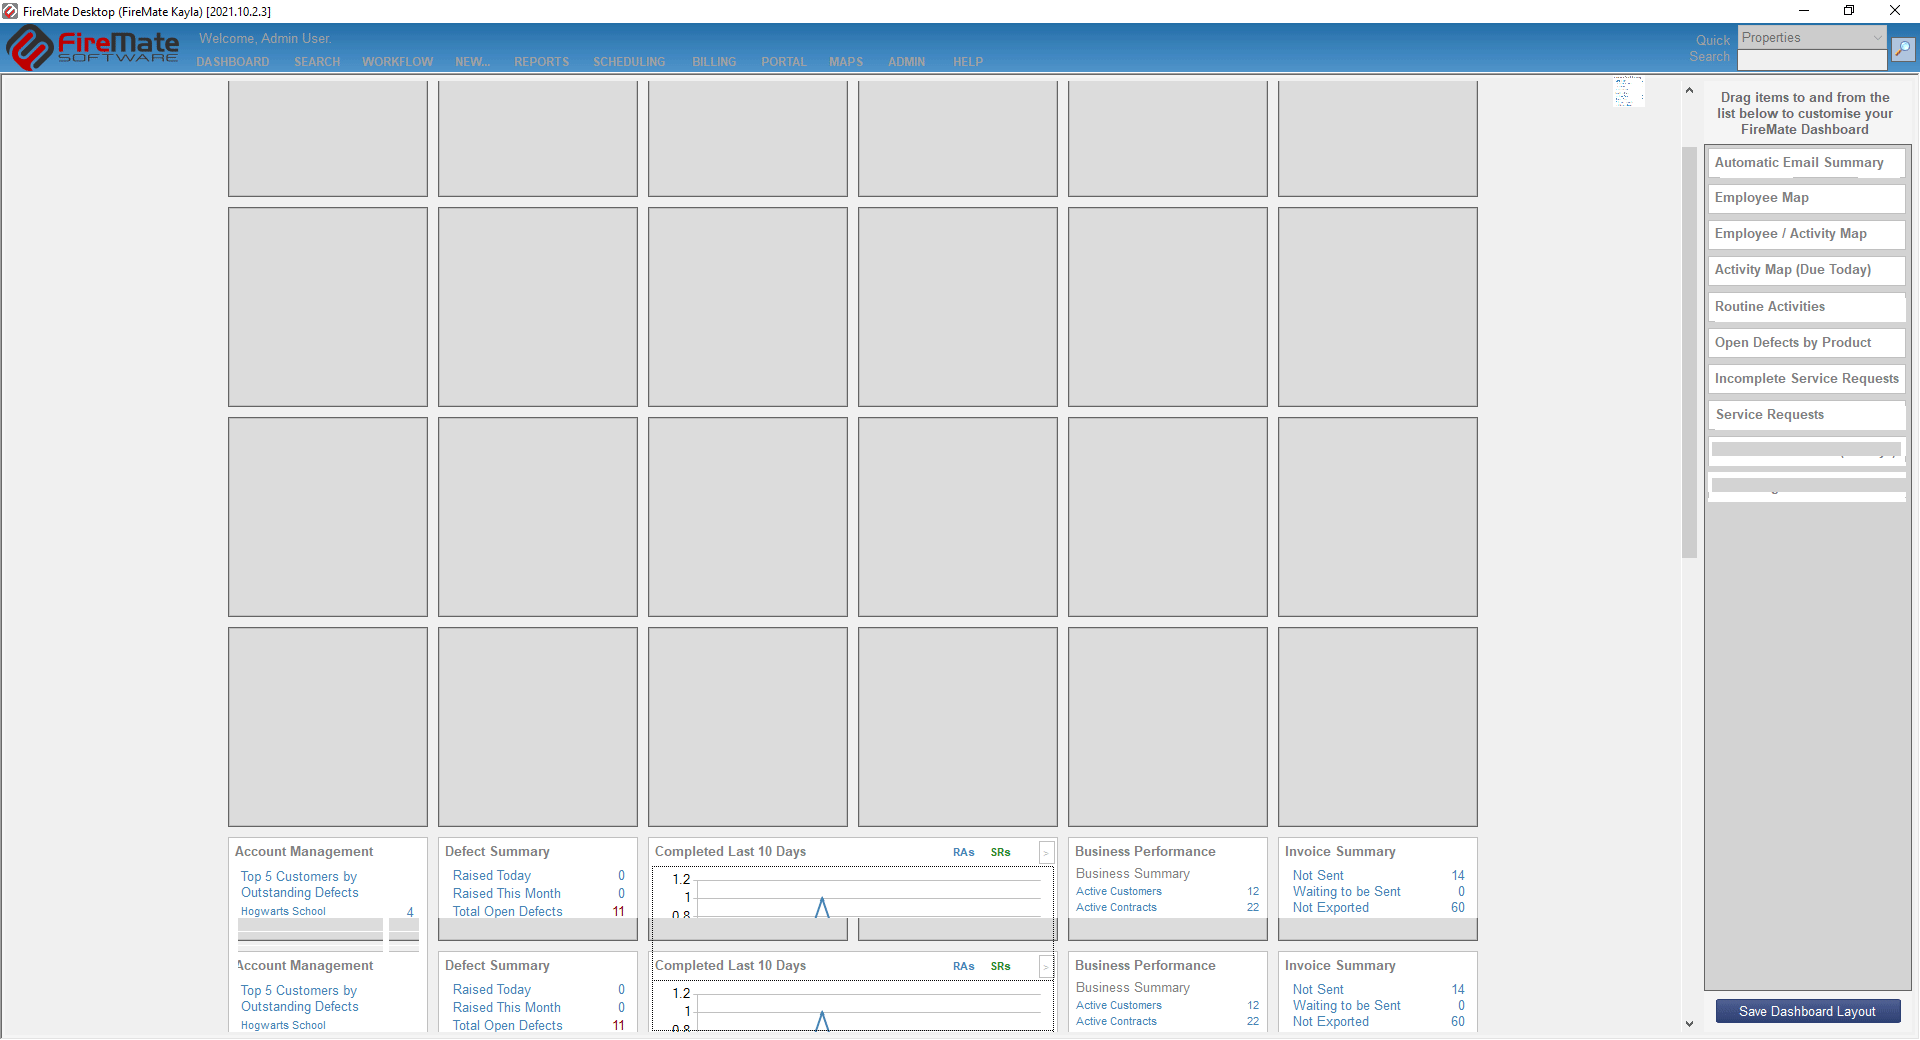
Once you are happy with your widgets, select [Save Dashboard Layout] located at the bottom of the widget menu.

Customise the Web page widget
- Add the web page widget to the dashboard
- Left or right-click on the browser widget in the heading
- In the pop-up, enter the URL you would like the web page widget to display.
- Select [Ok]
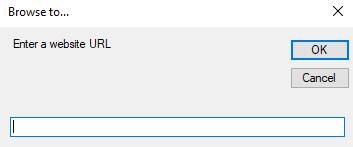
Only one web page per Dashboard can be entered so choose wisely! We recommend adding https://learn.firemate.com/ so your team can access the FireMate Knowledge Base directly from FireMate!